Banners
Creating a New Banner
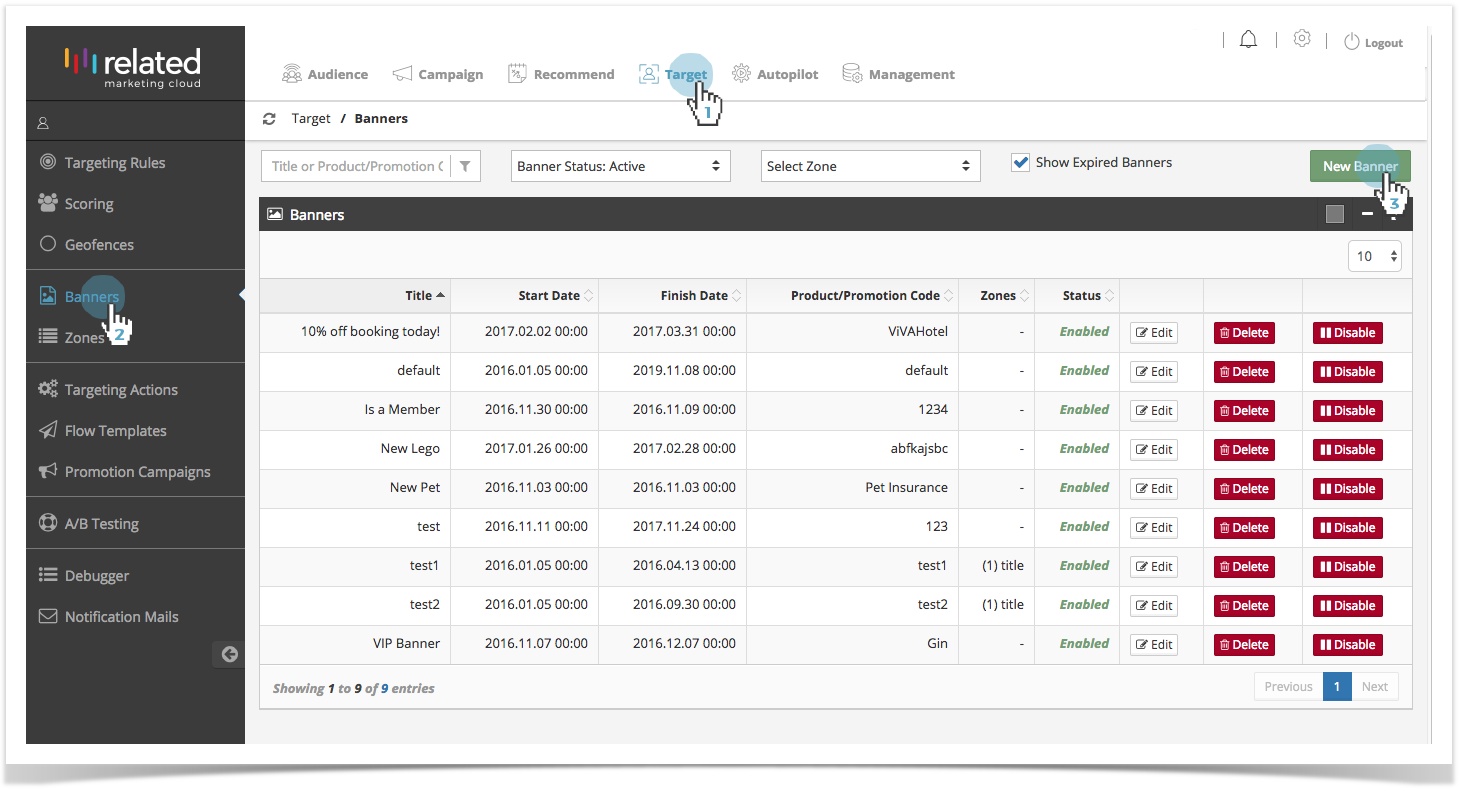
- Click Target in the top menu bar.
- Select Banners.
- Click on New Banner.
1. Enter the General Information
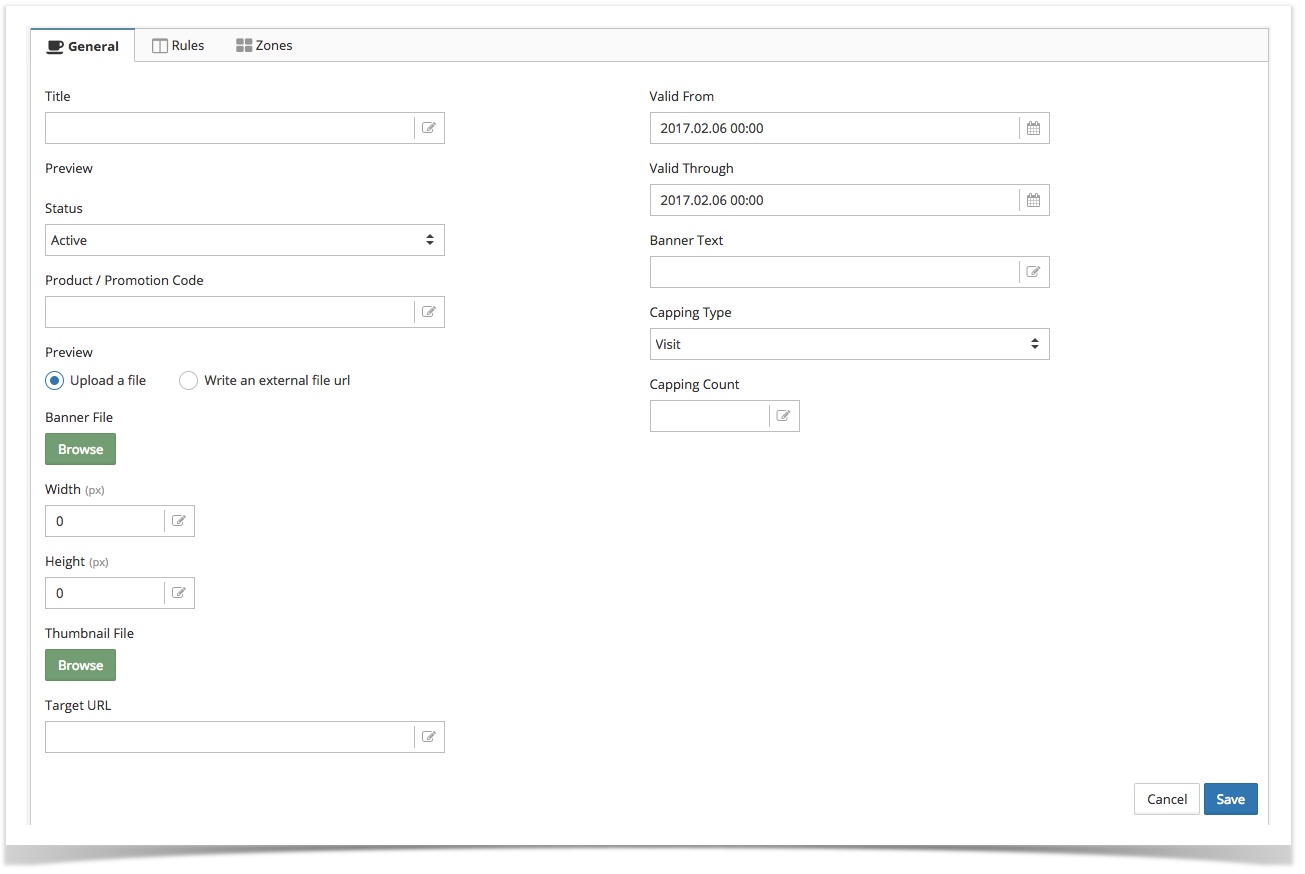
Enter the general information in the required fields to create a new banner:
- Title – the name of the banner. It is recommended that you use a name that uniquely identifies the banner, and will allow you to recognise the banner quickly and easily.
- Status – select the status; Active or Passive to enable or disable the banner to be displayed on the site.
- Product / Promotion Code – enter the product or promotion code code you would like to include in the banner.
- Upload a File – the banners' creative will be uploaded to the RMC database, and delivered to your website from this location.
You will be able to achieve greater performance by uploading the banner creative to your web server than uploading it to the RMC database, as the banner creative can be delivered directly by your web server, without the need to look up the file contents from a database.
- Write an external file url – use this option when the banner creative is already available externally.
- External Banner URL: RMC will deliver the creative from the URL supplied.
- External Thumbnail URL: add thumbnail to external url. OPTIONAL
- Target URL – link where the banner should lead when user clicks on it.
- Valid From – date and time from which the banner is displayed on the site.
- Valid Through – date and time after which the banner is no longer displayed on the site.
- Banner Text – enter banner text.
- Capping Type – use capping to apply delivery limitations for the selected banner. RMC supports the following delivery limitations:
- Limiting delivery by Visit: if set, RMC will not show more than the specified number of banner impressions (capping count) during a single visit. The capping count will be reset to 0 after each visit.
- Limiting delivery by Visitor: if set, RMC will not show more than the specified number of banner impression (capping count) to a given visitor, across all visits.
- Limiting delivery by Visit: if set, RMC will not show more than the specified number of banner impressions (capping count) during a single visit. The capping count will be reset to 0 after each visit.
2. Save Changes
Once you have filled out all the fields, click on Save to create the new zone. You will be returned to the Target > Banners page, where you will be able to see your newly created banner.
3. Link Banners to Targeting Rules or Zones
In order to display a given banner to a website visitor, the desired banner that should be shown needs to be linked to the relevant Rule(s) and to the relevant Zone(s). This way, RMC knows which banners to display to different audience groups, across different zones. For more information about Targeting Rules that are available, see Categories for Targeting.
Click  on the Target > Banners page to link banners to Rules or Zones.

You can use the "AND" or "OR" logical operator to combine multiple rules. Any new rules you add with the "OR" condition will expand your audience (to include any visitor who meets your first set of rules or your second set of rules), while rules added with the "AND" conditions might shrink your audience (by requiring audience members to meet both first and second set of rules).
Skip this step until you have created one banner and one zone. Without a zone you will not be able to perform banner to zone linking. You also need to create Targeting Rules first to be able to link banners to Rules.
Managing Existing Banners
The initial page of Banners (Target > Banners) displays a list of previously defined banners. Filtering enables you to quickly see Active and Passive banners by Zone. You can also select "Show Expired Banners" to view banners that are no longer valid.
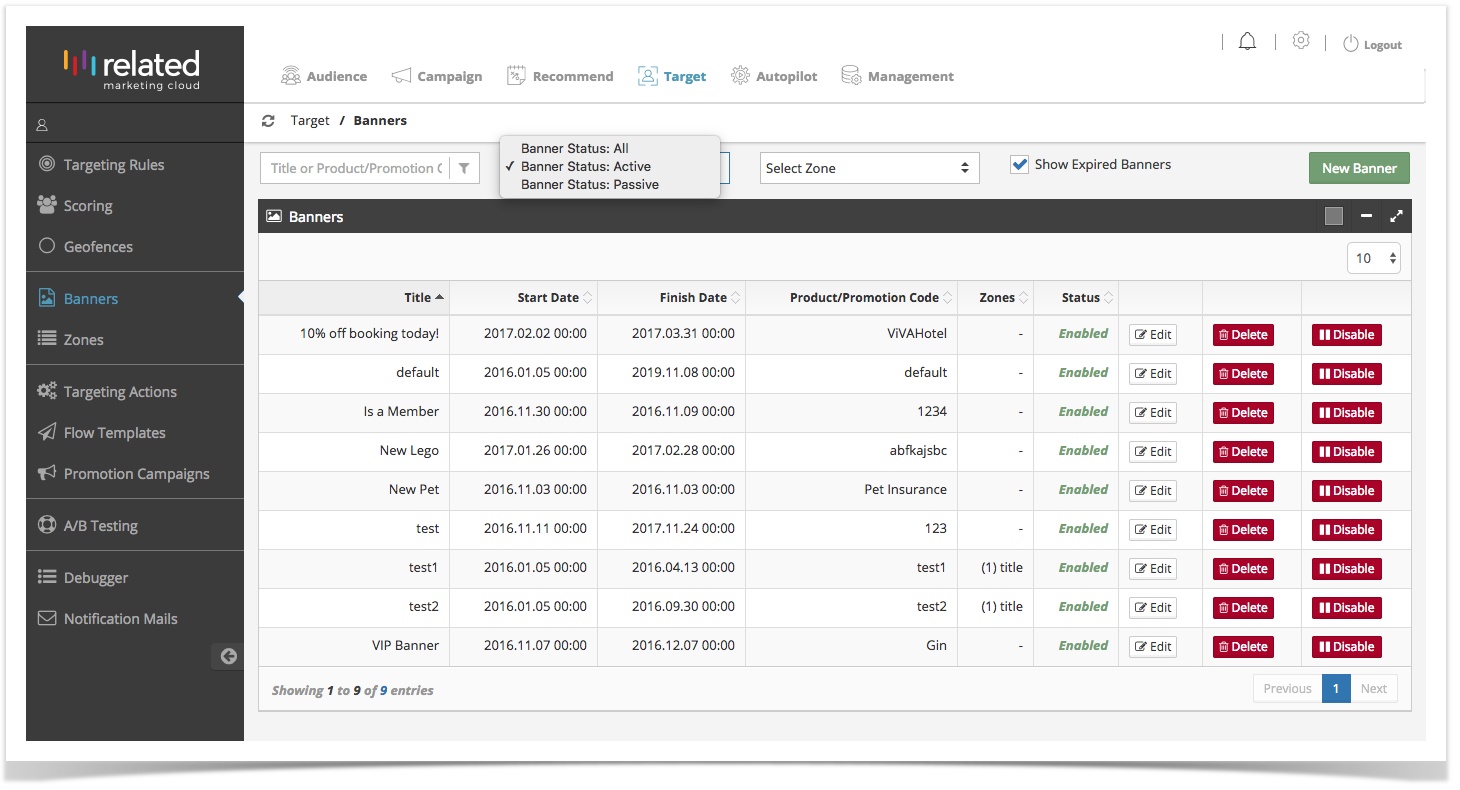
To manage existing Banners, use the following basic actions:
 – opens Banner's editing interface, where you can configure banners, rules and zones.
 – deletes the Banner.
 – disables the Banner (changes the status to Passive).
 – enables the Banner (changes the status to Active).
Parent Topic: Banner Management
Copyright 2020 Related Digital