Zones
Creating a New Zone
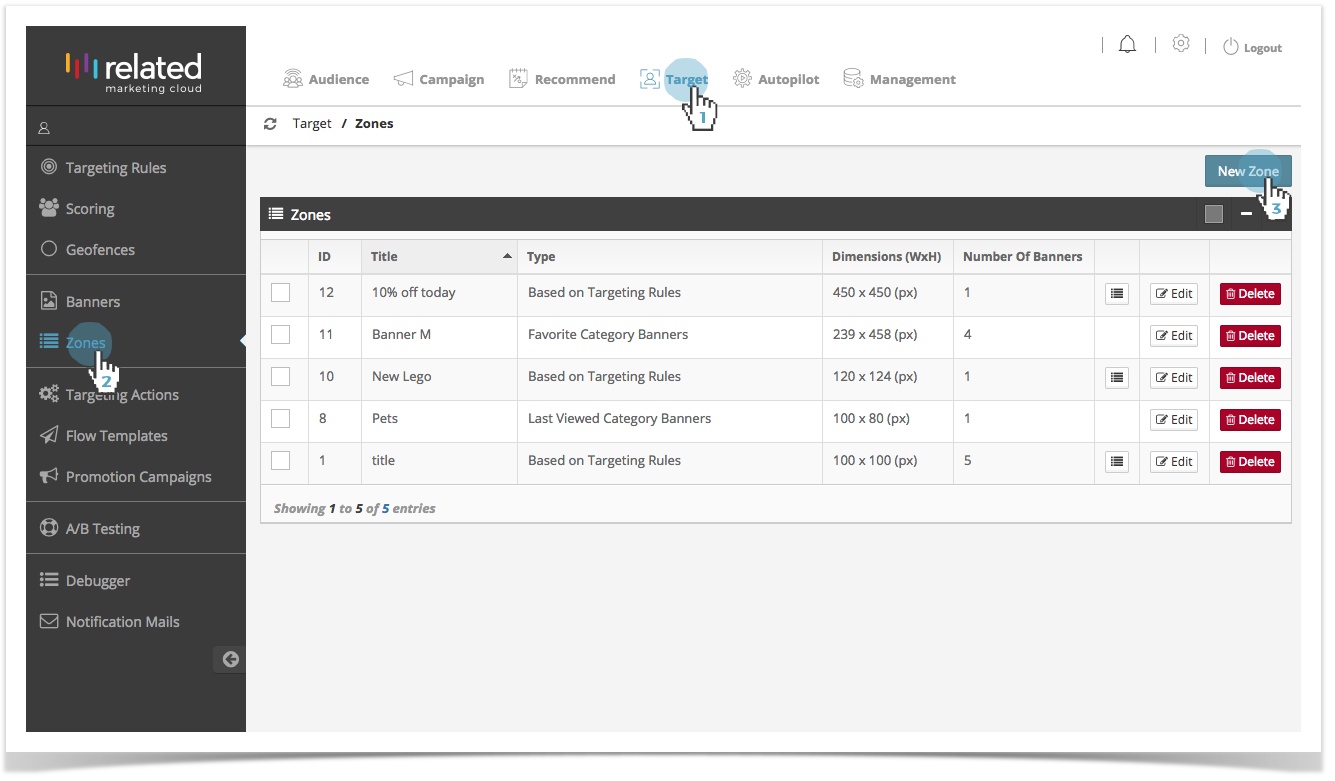
- Click Target in the top menu bar.
- Select Zones.
- Click New Zone
Or
To copy an existing Zone, click to edit and create a similar zone.
1. Enter General Information
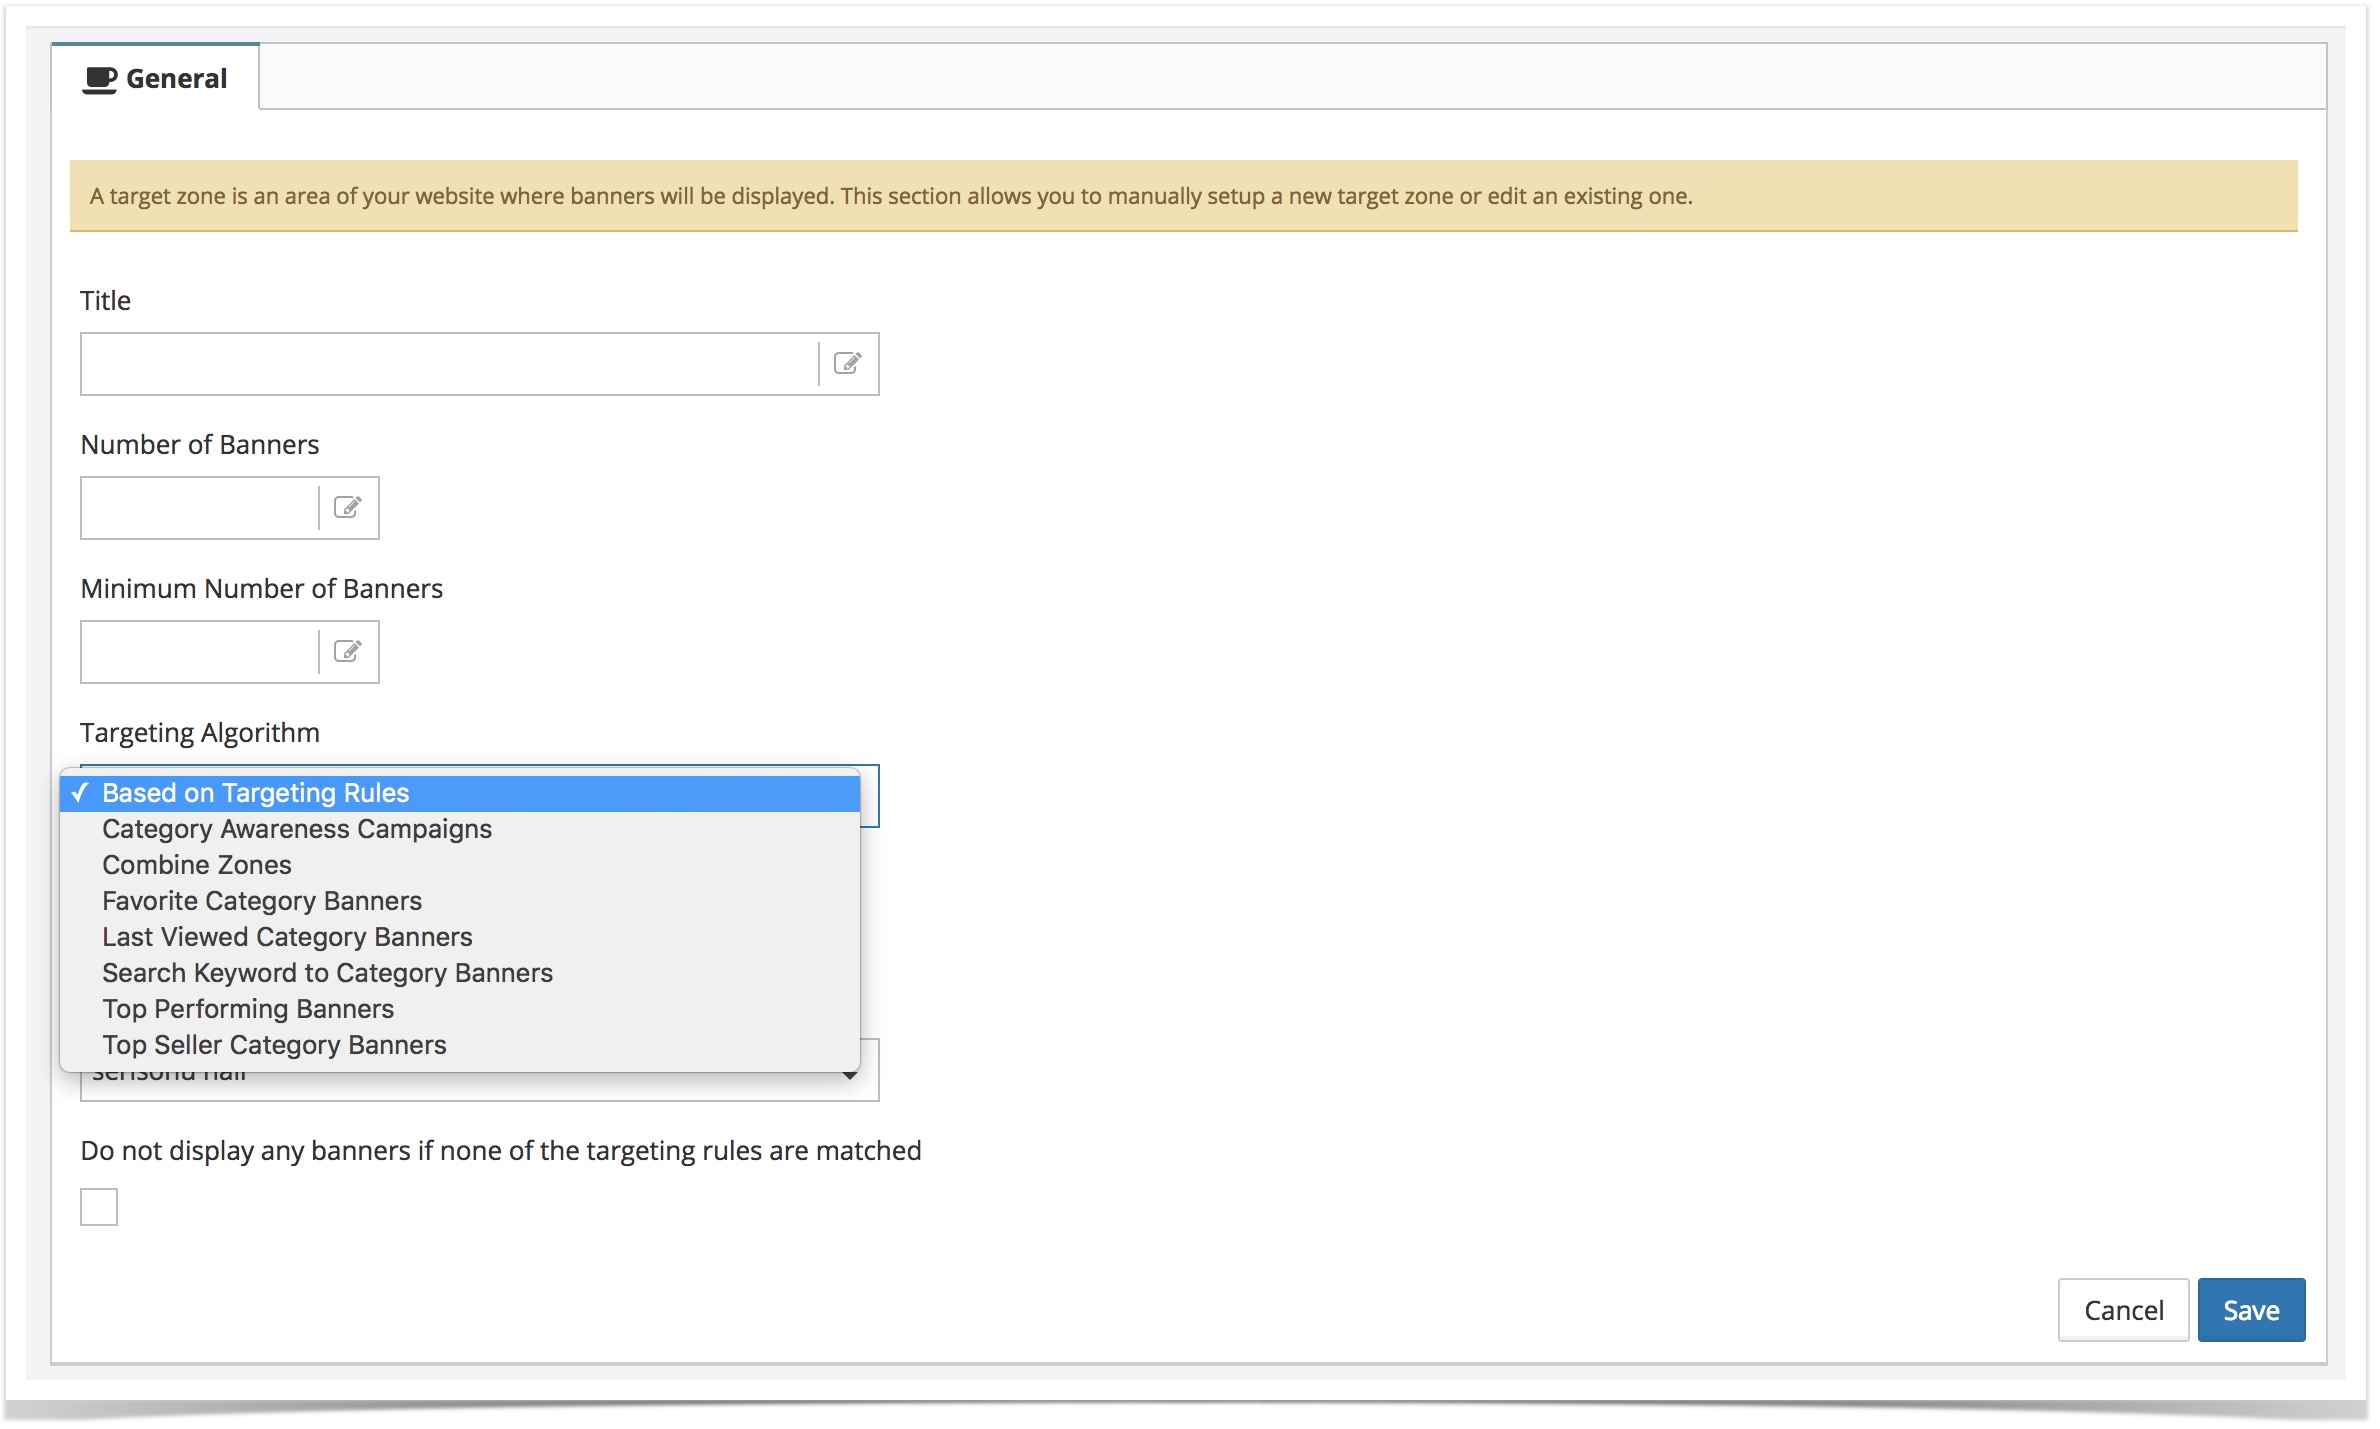
Enter the general information in the required fields to create the new zone:
- Title – name the zone. It is recommended that you use a name that uniquely identifies the zone, and will allow you to recognise the zone quickly and easily.
- Width (px) – enter the width of the zone in pixels.
- Height (px) – enter the height of the zone in pixels.
- Number of Banners – enter the total number of banners that will be displayed in this zone.
- Minimum Banner Count – enter the minimum number of banners that will be displayed in the zone.
- Default Banner – select a default banner to be displayed in case no banners are found to match the Targeting Algorithm.
2. Select Targeting Algorithm
RULE DRIVEN
Display banners based on Targeting Rules
Select this option to manage the display of banners based on each visitor's behavioural and demographic characteristics. The banner manager will automatically give preferential rotation weight to the banners matching your visitors' segment first, resulting in an optimised experience on your site that drives conversions. Banners matching your visitor will be displayed first. See Targeting Rules for more information on how to define your targeted audience.
CATEGORY DRIVEN
Advertising via banners can only be effective if you target the specific group of visitors actually interested in viewing further pages about the advertised topic. You do not want to advertise men's watches to a visitor who is interested in viewing your range of women's shoes. Category based algorithms allows you to display relevant banners to your visitors based on their shopping interest.
Categories for banners must be defined for category based algorithms to work.
- Category Awareness
Select this option to increase awareness for different product categories. The algorithm determines and finds the banners matching the visitor's favourite category. Priority of display are given to banners that do not match the visitor's favourite category. The frequency capping of each banner is also taken into consideration, banners with lower frequency caps are displayed first and rotated accordingly.
If two banners priority order is the same than Target looks at the Banner Order list to determine display priority. See Banner Priority to manually change the order of banners.
- Favourite Category Banners
This targeting algorithm allows you to define a category-driven system, which checks your banner repository according to the following steps:
- Checks for banners matching the visitor's favourite category.
- Selects the matching banners and changes the order of display. Matched banners are displayed first followed by the non-matching ones.
- A defined default banner will be displayed if no category related banners are found.
How is Favourite Category determined? Favourite Category is determined based on the most viewed category in the last 10 products browsed by the visitor. Favourite Category rule is automatically added to banners if the Category data is available.
- Last Viewed Category Banners
This targeting algorithm allows you to define a category-driven system, which checks your banner repository according to the following steps:
- Checks for banners matching the last categories viewed by the visitor (using visitor historical data or cookies).
- Selects the matching banners and changes the order of display. Matched banners are displayed first followed by the non-matching ones.
- A defined default banner will be displayed if no category related banners are found.
- Top Seller Category Banner
This targeting algorithm allows you to define a category-driven system, which checks your banner repository according to the following steps:
- Finds the top best selling product categories across the site.
- Checks for banners matching the visitor's favourite category.
- Selects the matching banners and changes the order of display. Matched banners are displayed first followed by the non-matching ones.
- A defined default banner will be displayed if no category related banners are found.
SEARCH DRIVEN
- Search Based
The targeting engine will automatically detect and create rules based on the product categories viewed as a result of keywords searched onsite. When a visitor performs a keyword search, the banner manager checks your banner repository according to the following steps:
- Finds the matching product categories based on the searched keyword.
- Checks for banners matching product category banners matching the keyword search.
- Selects the matching banners and changes the order of display. Matched banners are displayed first followed by the non-matching ones.
- A defined default banner will be displayed if no category related banners are found.
PERFORMANCE DRIVEN
- Top Performing Banners
The banner manager will automatically give preferential rotation weight to the banner that has the best performance based on the optimisation metric you choose, saving you the effort of resetting custom weights for each banner on a regular basis. The best performing banners will see the greatest amount of impressions, ideally resulting in the optimal performance of the campaign.
When using this algorithm, select the optimisation metric:
- CTR - Click Through Rate: this is calculated by the number of impressions / number of clicks for each creative.
- Revenue: total revenue generated by each banner creative.
- Conversion: total number of conversions generated by each creative.
When you have selected the metric that you want to optimise your banners with, you can start running your targeting algorithm to start getting stats for the campaign. As your campaign starts seeing impressions, clicks, conversions and revenue coming in, the optimisation algorithm will start choosing preference for the specific banners that perform better and giving it preference in the rotation. While other banners will still be shown, the banner that continues to perform better will see a higher proportion of impressions.
You can combine zones to manage the display and rotation of banners from different zones in one place. Sub Zones will determine the total number of banners to be displayed. If there are not enough banners in the pool to fill out all the slots, banners from the next zone will be used.
3. Save Changes
Once you have filled out all the fields, click on Save to create the new zone. You will be returned to the Target > Zones page, where you will be able to see your newly created zone.
Although you have now created a new zone, and you can link Rules and Banners to the new zone, no banners will be displayed on your website until you have also created the zone serving tag and inserted the tag into the website's code in the appropriate location.
Managing Existing Zones
The initial page of Zones (Target > Zones) displays a list of previously defined Zones.
To manage existing Zones, use the following basic actions:
- – opens Zone's editing interface, where you can configure the Zone.
 – deletes the Zone.
 – opens the Banner Order interface where you can manually change the display order of banners in the selected zone by dragging and dropping them anywhere you want. Changes will automatically be saved.
Analysing and Sharing Results
Each Zone you create with Banner Manager is monitored by RMC for standard metrics such as impressions, clicks, conversion and revenue, which are available in the Performance Dashboard (Target > Performance Dashboard). You can easily share the results of your personalisation campaigns by email or by exporting your data into a .csv file.
Parent Topic: Banner Management
Copyright 2020 Related Digital